I discovered that I had connected a red wire between the negative terminal of cap 104A and the negative terminal of cap 103. This is not unheard of (negative to negative) but why would you use a red wire? So I checked the Citation Pictorial a second time and then checked the instructions that Jim McShane includes with his kit. Sure enough, red wire goes from the (+) terminal of cap 104A to the (-) terminal of cap 103. That makes more sense.
Always double-check your work! And then check it again. Now, on to the terminal boards.
With the McShane power supply kit out of the way I am now going to assemble the pre-amp according to the assembly manual. So for those of you following along at home please turn your manual to page 7.
Starting with Board A I proceeded with the wiring. For the bare wire I stripped the PVC insulation off of 22 gauge tinned copper wire. The colored wire was 20 gauge silver coated stranded wire with Teflon insulation. My previous blog entry on the repairing of the terminal board lugs shows the beginning of the wiring of Board A. I have my reservations about using 20 gauge stranded wire for this project, but I will continue with it. I think 22 gauge solid core would be much easier to work with.
Wiring the board is easy. Simply follow the instructions in the manual, step by step. OK you say, but what are you going to do for the striped wiring? Hmmm... yes, that's a problem. I have 10 solid colors of wire, but no striped.
I thought about this and came up with the idea of using specialized labels for wiring. I found two candidates. Both are clear labels with a white patch for printing and are self laminating. You wrap them around the wire, label portion first, and the clear portion forms a lamination over the printed area. Both claim to be compatible with inkjet printers, but can also be used in color laser printers.
The problem with these labels is that they are expensive. The companies that sell them stock packages of something like 50 or 100 sheets at over $1 per sheet or you have to buy single sheets at something like $2-3 dollars per sheet. Add shipping on to a single sheet purchase and you're looking at up to $10 for a single sheet. Ridiculous! I ordered both label brands to experiment. First off, forget about inkjet printing, at least if you want to use the labels immediately. The labels need to dry for several days. I decided to use the labels from http://www.ziptape.com/ for this project. This company has a 10 sheet package for $20. The specific item I ordered is the 602 series, LSL-76 (1"x1"x0.34"). The labels are polyester and claimed to be thermostable to 302 degrees F.
Here's a photo of the labels and the terminal board at an early stage of wiring. The 3 white wires in the foreground are about to be labeled with white/blue stripes.
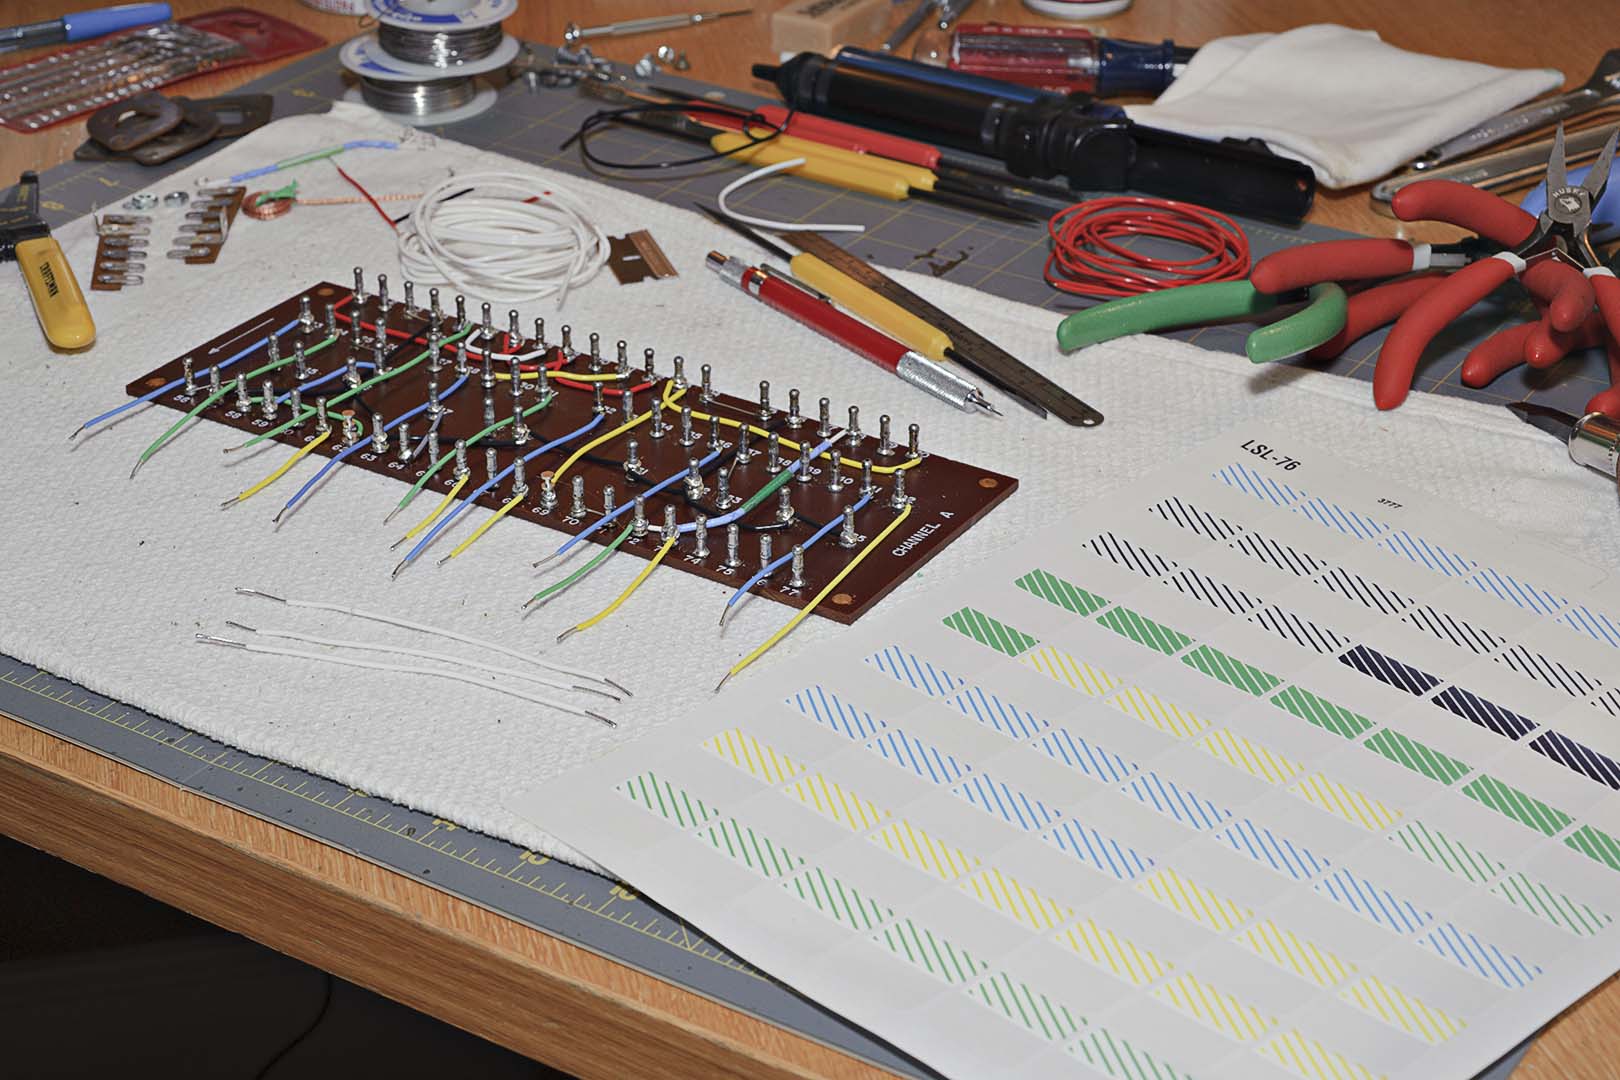
How did I make the stripes? Let's check the internet. Sure enough. Someone has created http://www.stripegenerator.com/. This site is for creating striped patterns that can be seamlessly tiled for use in creating backgrounds on web pages and other things. You can choose your colors, stripe width and spacing, etc. It then allows you to download your stripe pattern as a .jpg file. I then used the .jpg in Photoshop to create a larger picture file from tiled images that could be printed on the labels. The label itself was created in Microsoft Word using the LSL-76 label template (from ZipTape.com) and then printed to an HP color laserjet.
My biggest concern with the labels is whether they will come loose, i.e. begin to "unroll" from the wire. In fact, this does happen. I suspect that the small size of the wire is the cause here. A larger wire will require less curvature of the label, but 20 gauge appears to be too small. Now what? What if I used the soldering iron to seal (melt) the label to itself? Let's try it. Yes, it seems to work. You have to be careful. I found that simply doing a quick stroke of the iron across the seam of the label works just fine. Too much application of the iron will melt the label more than you want. And I'll be honest here. That happened to me a few times. But it's not a big deal. As long as the label won't come loose in the future and you can read the stripe pattern I'm happy.
So, I continued with the wiring of the boards and the installation of the resistors and capacitors. This isn't rocket science. Simply follow the instructions in the assembly manual and be very meticulous. When I was finished with Board A I continued on to Board B. This work is covered on pages 7 through 16 of the Citation Assembly Manual. The results are shown in the two pictures below.
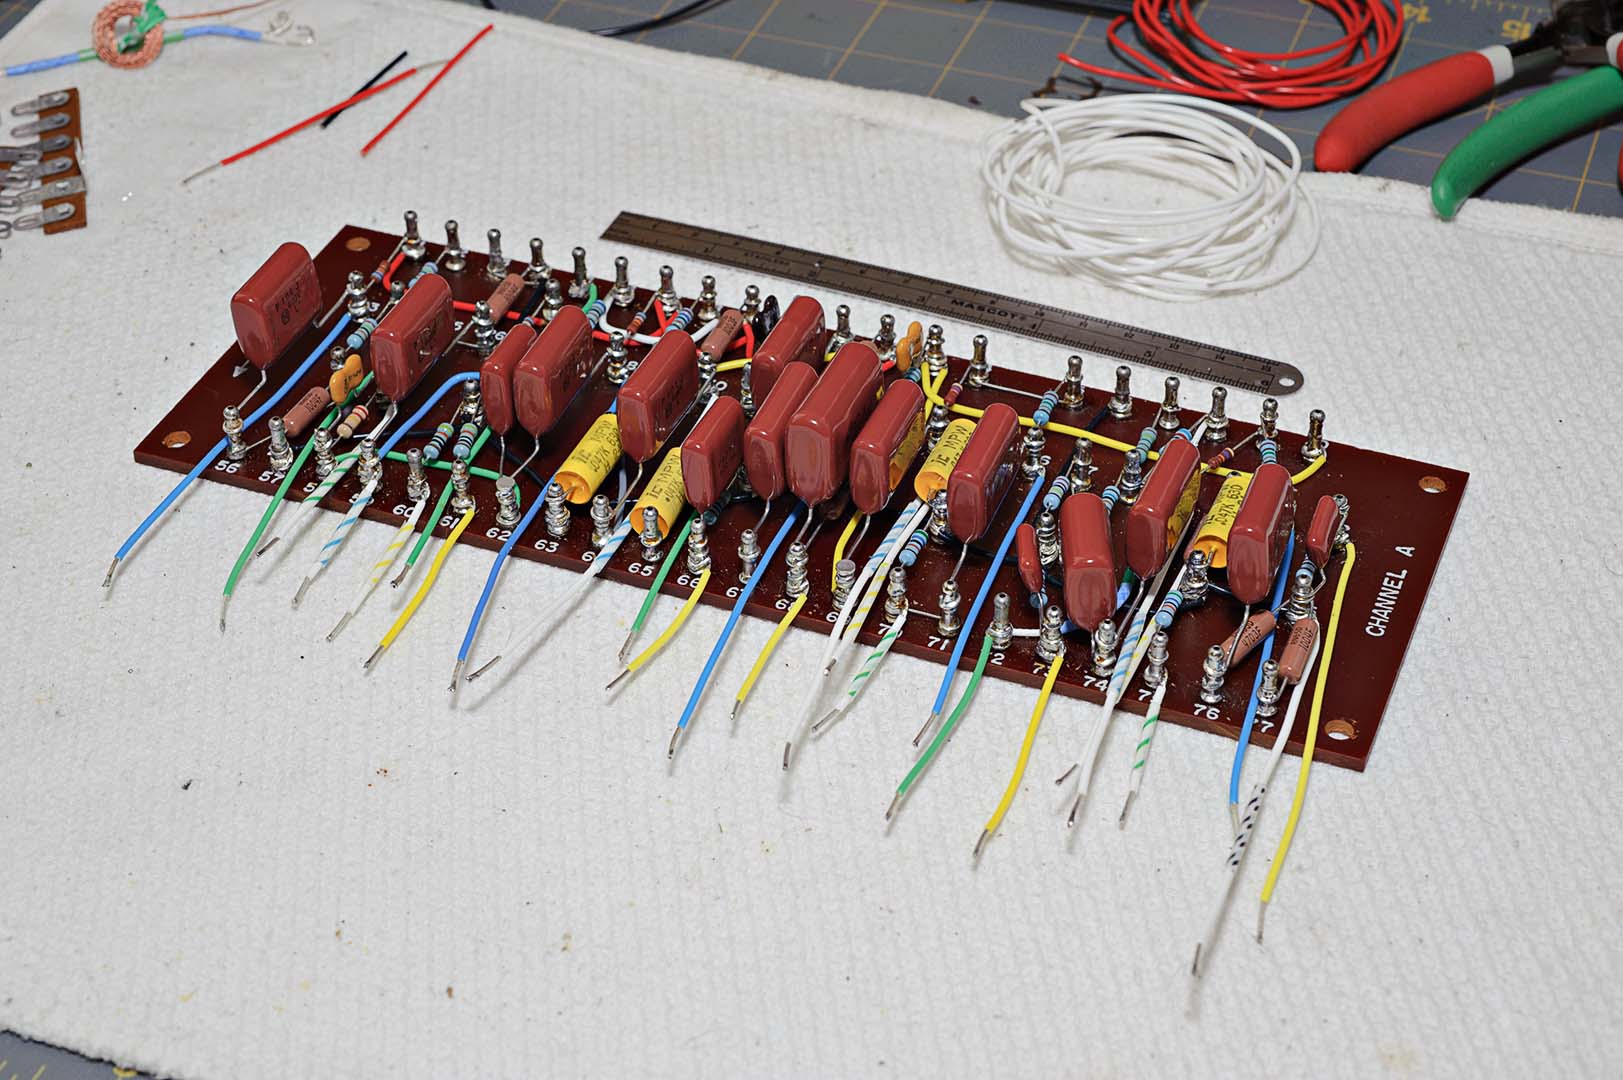
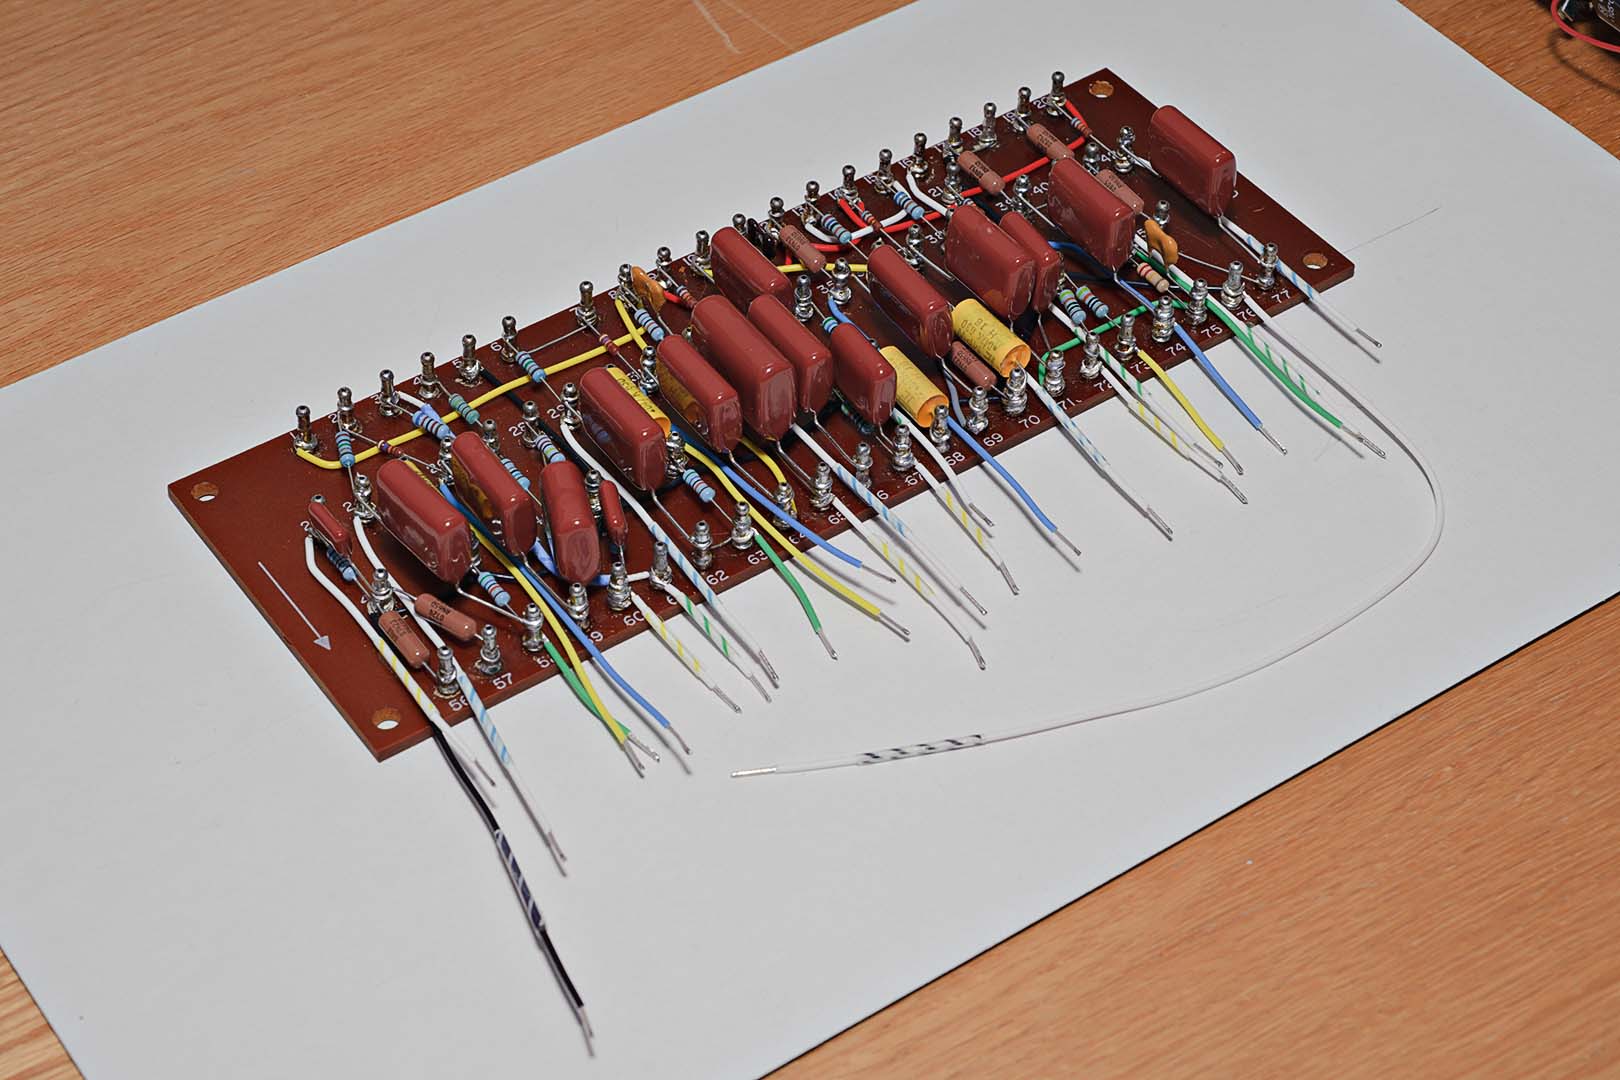
Note the striped wires. They're not perfect but I'm happy with them. I really don't have a good idea how else to tackle the problem. There are only two other options I can think of. 1) Don't replace the wiring and 2) Simply use solid colors for all wires and hope to keep them all straight during the assembly process and later repairs. The only remaining issue I have with my choice is the stiffness that the label imparts to the wire. When these wires are attached to the tube socket pins they are going to be tough to bend into position.
Here's another note. If you compare the finished Boards A and B to each other can you find a mistake. Again, double and triple check your work. If you compare the two lug by lug you'll find the error.
OK, Lug #76 on Terminal Board A. See the polypropylene cap connected to it? It's not supposed to go there; it's supposed to connect to Lug #75. I found this when going down the "Checked" column in the manual. I know why I made this mistake. It's simply because I got into a routine. Almost all the components connect in straight lines. There are only a few parts that are exceptions. I got sloppy and didn't read the step in the manual carefully.
There are two other pieces that are worth covering but I'll save them for future posts. One piece that deserves a blog entry all its own is "Where did I get all the parts?" I will put together a piece to outline where I collected all the pieces for this project. The second is related to this and that is "What do you use to replace all the shielded wire?" That doesn't deserve an entry all its own, but I will cover it in a future post.
Time Spent: I'm going to guess at ~12 hours total for both boards. It took me 3 or 4 evenings. This does not include all the time spent creating the labels.

No comments:
Post a Comment